

Banh mi is crispy and chewy on the outside, cottony soft and fluffy on the inside. Perfect.


Plus, this recipe uses tangzhong – that magical secret ingredient often used in soft Asian breads, like Japanese Milk Bread. Tangzhong will help keep your banh mi soft, fluffy and moist for days.


for some helpful tips before you begin, click here.
Makes 6 7-inch loaves.
tangzhong:
- 1/2 cup (120 ml) water
- 3 tablespoons (22.5 g) bread flour
dough:
- 2 1/4 teaspoons (1 packet or 7 g) active dry yeast
- 1 1/4 teaspoons (15 g) granulated sugar
- 1 cup (240 ml) water
- 3 3/4 cups (450 g) bread flour
- 1/2 cup (62 g) full-fat powdered milk
- 1 1/2 teaspoons (9 g) fine salt
- 2 tablespoons (30 ml) vegetable oil
- Clean spray bottle filled with water
1. MAKE THE TANGZHONG.
– In a small pan, over medium-high heat, combine 1/2 cup (120 ml) water and 3 tablespoons (22.5 g) flour for the tangzhong.
– Whisk until thick like pudding, maybe 3 or 4 minutes.
– Pour into a small bowl and refrigerate to cool while gathering the remaining ingredients.
2. ACTIVATE THE YEAST.
– Warm the water to about 110°F (43°C). (Slightly warm to touch.)
– In a small bowl, stir the yeast and sugar into the warm water.
– Let sit for 5 to 10 minutes, until foamy.
3. COMBINE THE INGREDIENTS.
– In a stand mixer bowl, briefly stir together the flour, powdered milk and salt to mix and to remove any large lumps.
– Add the tangzhong, vegetable oil and the foamy yeast mixture.
– Mix with a wooden spoon until the flour is absorbed and a shaggy dough is formed.
4. KNEAD THE DOUGH UNTIL SMOOTH AND ELASTIC.
– With the paddle attachment, knead the dough on medium-high speed (setting #4) for 7 minutes, until the dough pulls away from the sides and bottom of the bowl and gathers in the center. The dough will be a bit sticky, but should also be smooth, springy and elastic enough to stretch thin without tearing. (See TIPS)
- Using a stand mixer is highly recommended for ease, but if you prefer to knead by hand, click here for some TIPS.
5. LET THE DOUGH RISE UNTIL ALMOST DOUBLE IN VOLUME. (First rise)
– Scrape the dough into a large, lightly greased bowl.
– With lightly greased fingers, pull up the sides of the dough and fold into the center. Do this a few times to gather the dough into a ball.
– Flip the dough ball so now the top is smooth and greased.
– Cover the dough with plastic wrap and let rise for about 45 minutes or until almost double in size.
6. PUNCH DOWN THE DOUGH, RESHAPE AND LET RISE UNTIL INCREASED IN VOLUME BY ABOUT HALF. (second rise)
– Punch down the dough, pressing out all the gases.
– With lightly greased fingers, pull up the sides of the dough and fold into the center. Do this a few times to gather the dough into a ball.
– Flip the dough ball so now the top is smooth and greased.
– Cover with plastic wrap and let rise for about 30 minutes or until the dough’s volume has increased by about half.
7. SHAPE THE DOUGH INTO 6 BAGUETTES. (See TIPS)
– Scrape the dough onto a lightly oiled countertop.
– Divide the dough into 6 equal pieces.
– Grab one end of a piece of dough and fling it with a slap against the counter to elongate it and release any air within. Do this a couple of times, until the piece of dough no longer has any air bubbles.
– With a lightly oiled rolling pin or with fingers, roll or press the dough out into a thin sheet (avoid tears and thin spots), about 7-inches wide at the bottom and narrower at the top.
– Starting from the top, roll the sheet of dough downward into a snug torpedo, pressing the tapered ends as you go to seal. (The rolled-up dough will look like a skinny football.) Pinch the seam.
– Place the shaped dough, seam-side down, in the slots of a baguette pan or on a parchment paper-lined baking sheet at least 2-inches apart.
8. LET RISE FOR ABOUT 40 MINUTES OR UNTIL ALMOST DOUBLE IN VOLUME. (Third rise)
– Cover the dough loosely with lightly greased plastic wrap and a tea or kitchen towel.
– Let rest and rise (proof) about 40 minutes, or until just about double in size.
9. WHILE PROOFING, PREHEAT THE OVEN TO 425°F (218°C).
– While proofing the dough, preheat the oven to 425°F (218°C). (Expect the oven to take about 30 minutes to preheat.)
– Place the oven rack in the center position.
10. SLASH THE PROOFED LOAVES, SPRAY WITH WATER AND PLACE IN THE OVEN.
– Slash the loaves with a sharp blade down the length of the loaves about 1/8-inch deep. (See TIPS)
– Spray the slashed loaves with water and immediately place in the hot oven.
– Spray the sides and floor of the oven with water and shut the oven door immediately.
11. BAKE FOR 13 to 18 MINUTES OR UNTIL DEEP GOLDEN BROWN.
– Spray water into the oven (bottom and sides) 3 more times during the first 5 minutes of baking.
– After 7 minutes of baking, rotate the pan and turn the oven down to 400°F (204°C).
– Bake for another 6 to 11 minutes or until the bread has become a deep golden brown, sounds hollow when tapped and has an internal temperature of 190°F (88°C).
– Place the baked loaves on a cooling rack.
– If the crust softens after cooling, just place in a 400°F (204°C) oven for a minute or so until the crust is crispy again.
*****
To store: Keep completely cooled bread in a sealed container or bread bag at room temperature for up to a week.
Or freeze: Wrap securely in at least 2 layers of plastic wrap and freeze for up to a month.
To reheat from frozen: Take the bread out of the plastic wrap. Place each frozen loaf in a sheet of aluminum foil and wrap, folding the edges together to seal. Place in a 400°F (204°C) oven directly on the center rack for 10 to 15 minutes, or until the crust has crisped up.
*****


About this recipe
Banh mi (Vietnamese baguettes) are light, airy sandwich rolls with a thin, crispy crust and fluffy, soft, cottony insides. Typical banh mi sandwiches usually include meats, pickled vegetables and fresh herbs. But, as you can imagine, this is a perfect roll for just about any type of sandwich.
And what makes this banh mi even better is the incorporation of tangzhong.
Tangzhong is a cooked roux of flour and water that is added to the bread dough. The addition of tangzhong helps the bread dough retain moisture. This promotes fluffiness and helps keep the bread soft, light and moist, prolonging its shelf life for days. It is a “secret” ingredient I try to incorporate in all my breads such as my Japanese Milk Bread, Siopao (meat-filled steamed buns), Pandesal and Soft and Chewy Pita Bread.


Siopao Bola Bola, Pandesal with brown butter and a Soft and Chewy Pita Bread.
TIPS:
Here are 5 helpful TIPS:
1) Some tips about starting your dough:
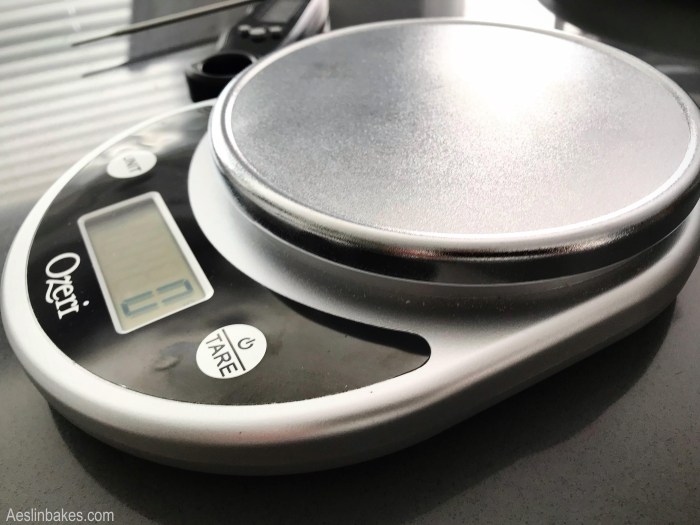
Use a scale, if you have one. Weight measures are more accurate than volume measures.
– While I sometimes find using volume measures more convenient, in baking, weight measures will give more accurate and consistent results. So if you bake regularly, you really should get a scale. (Preferably one that reads ounces and grams.)

Cool the tangzhong to room temperature.
– Be sure to give to give your tangzhong time to cool. If your tangzhong is still too hot when used, it may harm the yeast.

Make sure your yeast is active.
– Yeast must be alive and active for bread dough to rise. You know your yeast is active if it becomes foamy when stirred into the warm water with a little sugar.
– When activating your yeast, make sure the water is just slightly warm to touch, no warmer than 110°F (49°C). If the yeast doesn’t become foamy within 5 to 10 minutes, throw it out and try again.
– Do not let the yeast sit too long after it has become active and foamy. If the activated yeast sits too long, it may become less effective.


2) Some tips about kneading:
Knead until smooth and stretchy.
– Kneading is key in this recipe for not only getting light, fluffy, soft bread, but also for achieving a smooth, thin, crispy crust. So knead your dough until it is nice and smooth and elastic enough to stretch thin without tearing.
- The dough should be able to be stretched until almost translucent without breaking or tearing (the “windowpane” test).


- Using the paddle attachment and kneading at a moderately high speed makes kneading this sticky dough until smooth and elastic pretty effortless.
- This dough is soft and sticky. That’s normal. Do not add any extra flour or the bread may become dense and heavy.
If the dough did not pass the windowpane test:
- If the dough did not pass the windowpane test, let it rest for 10 to 20 minutes. Retest the dough. If the dough still does not pass the windowpane test, knead for 3 minutes then re-test.
- Repeat (rest and knead) until the dough is smooth and elastic enough to pass the windowpane test.
Do not over-knead.
- Knead until the dough passes the windowpane test. But if you start to feel the dough becoming firm and less stretchy, stop kneading or else you risk over-kneading your dough. Over-kneaded dough will become a dry and dense loaf with a hard crust.
Kneading by hand:
It is much easier to use a stand mixer for sticky dough. But if you do not have one or choose not to use one, kneading sticky, messy dough by hand is completely do-able. Here’s one way to do it: The French Knead (aka Slap and Fold method)
- Mix the shaggy dough with a pastry scraper to ensure there are no dry spots of flour. Cover with plastic wrap and let the dough rest for about 20 to 30 minutes to let the flour absorb some of the moisture.
- After resting, bring the dough together a bit by mixing it with a pastry scraper before scraping it out onto a clean, smooth counter.
- Using fingertips, pick up the top half of the dough, lift the entire mass and then slap the hanging end of the dough onto the counter, letting it stick and anchor itself. In one motion, stretch the dough toward you and then fold it over on itself.
- Next pick up the dough from the left side, lift, slap, stretch and fold. Do it again, picking up the dough from the left. (This will rotate the dough for even kneading.)
- Repeat the process, taking breaks occasionally to clean up the counter with a pastry scraper.
- The dough will be sticky and all over the place at first. That’s OK. Don’t add flour, water or oil in an attempt to conquer the stickiness. Just keep going and the dough will come together eventually.
- Knead until the dough passes the windowpane test. The dough will still be sticky, but should be manageable. It should also be smooth and elastic.
Some tips:
– Pick up the dough with fingertips. The less full-handed contact, the easier it will be.
– Clean off the countertop occasionally with a pastry scraper. The cleaner your surface, the smoother the process will go.
– Be patient. The dough will be everywhere for awhile. Just keep the rhythm going even if everything is sticking together. Eventually the dough will stick more to itself and less to the countertop or your fingers.
Feel free to take breaks.
Bread dough continues to build structure (gluten) even while resting. So feel free to take short breaks while kneading. (Be sure to cover your dough with plastic wrap to prevent it from drying out.)
- It takes me about 20 minutes of continuous kneading to reach a smooth windowpane. (Although I have read that others are able to do it in considerably less time.) But I have also gotten beautiful smooth results with a great windowpane by kneading for 5 minutes and resting the dough for 10 minutes and repeating this 3 or 4 times.
Here’s one of the great videos that I watched to learn the French Knead method:

3) Shaping your baguettes:


– Grab one end of a piece of dough and fling it with a slap against the counter to elongate it and release any air within. Do this a couple of times, until the piece of dough no longer has any air bubbles.

– With a lightly oiled rolling pin or with fingers, roll or press the dough out into a thin sheet (avoid tears and thin spots), about 7-inches wide at the bottom and narrower at the top.
– For longer, skinnier loaves, make the sheet of dough about 9-inches wide at the bottom.

– Starting from the top, roll the sheet of dough downward into a snug torpedo, pressing the tapered ends as you go to seal. (The rolled-up dough will look like a skinny football.) Pinch the seam.


– Place the shaped dough, seam-side down, in the slots of a baguette pan or on a parchment paper-lined baking sheet at least 2-inches apart.
4) Rising and slashing your baguettes:


- Let your banh mi rise until puffy and just about double in size.
- Slash with deliberate strokes with the blade at a slant for straighter, more even slashes.
– Slashing your dough allows your loaves to expand in a controlled way while baking. It helps keep your loaves nice and evenly shaped.


– The little tool above is called a “lame”. But you don’t need a special gadget. Any straight, super sharp edge will do.
– Dip the blade in water before slashing for a smoother cut.
5) Baking your banh mi:
To get a crispy crust:
- Steam is essential for getting a crispy crust. Don’t forget to spray water into the oven (bottom and sides) 4 times during the first half of baking.
- If, near the end of baking, the crusts are not browning at the sides, turn the rolls onto their sides.
Baking times may vary.
– Ovens vary, so times given in recipes are only estimates. Keep an eye on your banh mi because it may take more or less time for your banh mi to be done baking.
Get an instant-read thermometer.

– An instant-read thermometer removes any guessing when determining whether your baked goods are fully baked.
– Bread is done baking at 190°F (88°C).
*****


Do you prefer long skinny loaves or the shorter, chubby ones?


*****
Related Recipes:
Here are some other recipes using TANGZHONG!
Soft and Fluffy Wool Roll Bread


Soft and Airy Brioche (Tangzhong)

Japanese Milk Bread

Soft & Airy Pandesal (Tangzhong)

Soft Cinnamon Rolls (Tangzhong)

Click HERE for more BREADS recipes!
–
–
–
Ads