Chocolate Tart (Smooth & Silky) – This is an amazing tart. The chocolate filling is lighter, smoother and silkier than a straight ganache. The crust is crisp and buttery, like a cookie. And it slices beautifully.

Serve this silky, smooth chocolate tart at room temperature, chilled or even frozen.


Make this tart the day before you want to serve it. This will not only to ensure the tart is set, but will also allow the flavors of the tart to meld and mellow.
For some helpful tip before you begin, click here.
This recipe makes one 11-inch shallow tart.
INGREDIENTS:
sweet pastry shell
- 2 cups (240 g) all-purpose flour
- 1/3 cup (67 g) granulated sugar
- 1/2 teaspoon (3 g) sea salt
- 3/4 cup (170 g or 1 1/2 sticks) unsalted butter
- 1 large egg yolk
- ice water
- 1 egg white
chocolate filling
- 1 cup (170 g) semi-sweet chocolate chips (at least 50% cocoa)
- 1 cup (179 g) milk chocolate chips
- 2 teaspoons (10 ml) vanilla extract
- 1/8 teaspoon (.75 g) sea salt
- 2 tablespoons (30 ml) corn syrup
- 4 tablespoons (57 g) butter
- 1 1/4 cups (300 ml) heavy cream
- 6 large egg yolks
INSTRUCTIONS:
SWEET PASTRY SHELL
1. Freeze the butter.
– Cut the butter into small cubes or thin pats.
– Freeze the butter pieces for at least 30 minutes, until frozen hard.
2. Pulse the butter and the dry ingredients until resembling coarse crumbs.
– Combine the flour, sugar, and salt in a food processor. Pulse 2 or 3 times, until combined.
– Add the frozen butter to the flour mixture and stir it up a bit to coat the butter pieces with flour.
– Pulse until the mixture resembles coarse crumbs.
*If you don’t have a food processor, use a pastry cutter, two butter knives (criss-cross to cut the butter in), forks or even a potato masher.
3. Pulse in the egg yolk and enough ice water until mixture just holds together.
– Add the egg yolk, and continue to pulse until the yolk is evenly incorporated and the mixture resembles a fine meal.
– Pour the ice water one tablespoon at a time and pulse until the mixture just holds together. (Squeeze a small amount together. If it crumbles in your hand, add more ice water, one tablespoon at a time, until it no longer crumbles apart.)
4. Form the mixture into a disk, wrap in plastic wrap and then chill at least 30 minutes.
– Pour the mixture out onto the counter and bring everything together, kneading gently and briefly to form the dough into a disk.
– Wrap the disk in plastic wrap and refrigerate for at least 30 minutes.
5. Roll out the dough into a large round about 13-inches wide.
– Remove the chilled dough from the fridge.
– On a lightly floured surface, roll the dough into a thin round about an inch or two larger than the base of the tart pan. (If the dough is too firm to roll out, let it rest at room temperature for about 15 minutes.) The dough should be about 1/8-inch thin.
– Lift and turn the dough as you work, keeping the work surface lightly dusted with flour to prevent sticking.
6. Ease the dough into the tart pan. Freeze at least 30 minutes.
– Place the tart pan on a baking sheet for ease of movement.
– Pick up the dough by gently rolling it up around the rolling pin and then unrolling it over the tart pan.
– Ease the dough into the tart pan, nudging it into the corners and fluted edges without stretching it.
– Fold extra crust inward to double the thickness of the outer crust. (This makes the crust a little sturdier.)
– Gently push the dough into the corners and crevices, making sure to press out any air bubbles.
– Place the tart shell in the freezer. Freeze for at least 30 minutes.
7. Begin blind baking the tart shell with pie weights at 350°F(176°C) for 40 minutes.
– While the tart shell is in the freezer, preheat the oven to 350°F(176°C) and move the rack to the lower third position.
– Line the frozen tart shell with a large sheet of foil – large enough to hang over the edges of the tart shell. Fold the foil outward so that the edges of the tart shell are shielded from over browning.
– Fill completely with pie weights. (You can use uncooked rice or dry beans.)
– Bake for 40 minutes.
8. Remove the pie weights. Brush with egg white. Finish baking until dry and golden.
– Lift out the foil with the pie weights.
– Place the tart shell back in the oven and bake for another 5 minutes to dry the tart shell a bit. (If the tart shell is puffing anywhere, just lightly press the puffed areas down with a spatula.)
– Remove the tart shell from the oven and then, using a pastry brush, lightly brush the tart shell with a beaten egg white to coat.
– Return to the oven and continue to bake for another 10 to 15 minutes or until the inside of the tart shell is completely dry and golden brown. (Use a pie shield to protect the edges from over browning, if needed. See TIPS.)
– Set aside to cool completely.
*See my page on CRISP & BUTTERY SWEET PASTRY CRUST (& HOW TO BLIND BAKE) for baking and troubleshooting tips.
–
CHOCOLATE FILLING
9. Place the chocolate and butter in a large heat-proof bowl with a sieve.
– In a large heat-proof bowl, place the chocolate, butter. vanilla, salt and corn syrup.
– Place a sieve over the bowl. Set aside.
10. Combine and heat the egg yolks and cream over a double boiler until thickened.
– Prepare a medium saucepan of simmering water to use as a double boiler.
– Have an instant-read thermometer handy, if you have one.
– Heat the cream in a small heavy-bottomed saucepan over medium heat until bubbles form at the edges of the saucepan and steam begins to appear. Do not boil.
– Meanwhile, whisk the egg yolks until smooth.
– Slowly pour the hot cream into the egg yolks while whisking continuously.
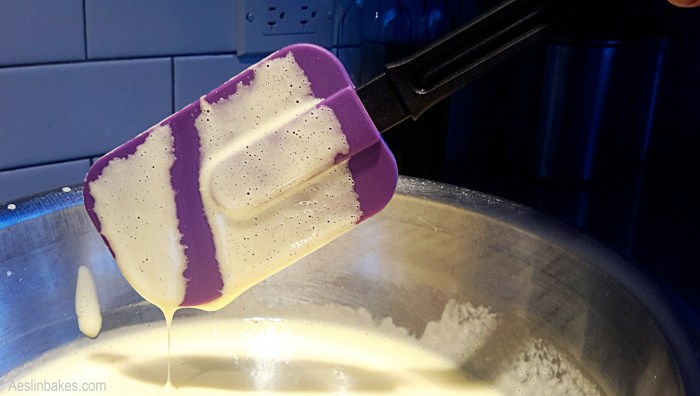
– Place the bowl over the saucepan of gently simmering water, constantly stirring and scraping the bowl with a rubber spatula, until the mixture just slightly thickens and coats the spatula enough that you can run a clean line through it with your finger. The mixture will read about 160°F (71°C) on an instant-read thermometer. (See TIPS.)
- Do not overcook or over thicken the mixture. It should still be very pourable.
11. Pour the hot egg yolk/cream mixture over the chocolate. Stir until smooth.
– Remove the egg yolk/cream mixture from the heat and strain into the bowl of chocolate.
– Slowly stir with a wooden spoon or rubber spatula until combined and smooth. Try not incorporate any air into the chocolate. If necessary, place back on the pan of simmering water and stir until the chocolate is melted and the mixture is smooth.
12. Pour the chocolate slowly into a large bowl and then into the tart shell.
– Pour the chocolate very slowly into another large bowl, allowing any bubbles to pop as it pours. (This step is important for removing large bubbles as well as cooling the chocolate.)
– Then pour the chocolate into the cooled, baked pastry shell. Gently shake the tart to distribute the chocolate filling evenly.
– Pop any remaining bubbles with a toothpick or graze over quickly with a blowtorch before the chocolate begins to set.
13. Let the chocolate tart set at room temperature. Then chill.
– Let sit at room temperature until completely cooled, at least 4 hours to overnight. The tart should be set, but will still be very soft.
– Chill the tart in the refrigerator until completely set, at least a couple of hours.
– After the tart has set, carefully remove the tart from the tart pan and transfer to a serving platter.
Serve at room temperature, chilled or even frozen.
– This tart is softest at room temperature, but may be served chilled or frozen as well.
– For the cleanest slices, slice the chilled tart with a hot knife. Wipe the knife clean between slices.
Keep refrigerated.

*****

About this recipe
The crust is lightly sweet, crisp and buttery. The filling is rich, but not heavy. This silky chocolate tart is smooth, soft, and slices beautifully.
The tart is softest at room temperature, but is just as delicious straight from the refrigerator or even from the freezer.


This smooth and silky chocolate tart takes a bit of time to make – mainly setting time. But it’s well worth it.
TIPS:
Here are 6 helpful tips:
FOR THE CRUST:
1) Start with cold ingredients.
– Starting with cold ingredients will keep the butter solid and will prevent it from melting and then blending into the flour. This will help keep the sweet pastry crust crisp and light. It will also help keep the dough from getting sticky and difficult to work with.
2) Give the dough enough resting time.
– After being processed, rolled, nudged and pressed, sweet pastry crust needs to rest. Skimping on the resting time and not allowing the dough to relax will cause it to tighten up, resulting in a tough, shrunken crust.
3) Don’t be afraid to get good color on your tart shell.
– A well-baked, deep golden brown tart shell will have great texture as well as wonderful toasty flavor. Perfect for a chocolate tart. To me, it makes all the difference.


– Use a pie shield to prevent the edges from burning. If you don’t have one, you can make one from foil. (Fold and cut out the center like making a paper snowflake.)


*See my page on CRISP & BUTTERY SWEET PASTRY CRUST (& HOW TO BLIND BAKE) for baking and troubleshooting tips.
FOR THE FILLING:
4) How to tell when the egg yolk/cream mixture is done:
- The mixture should be just thick enough to coat the spoon (or spatula). You should be able to run a clean line through it with your finger.
- The mixture should reach 160°F (71°C).

5) Don’t forget to pour the egg yolk/cream mixture through a sieve.
- This will ensure your chocolate filling is smooth and silky.

6) Cool your chocolate tart gently.
– Placing the chocolate tart in the refrigerator right away will set it much faster and it will still be as delicious as ever. But I find setting and then cooling the chocolate tart gently makes a smoother and shinier tart.


*****
Related Recipes
Lemon Posset

Vanilla Bean Panna Cotta

Click here for more DESSERTS recipes!
–
–
–
–
ADS